Transitions and animations
Transitions and animations
Transitions
Slide transitions are the effects that take place between slides when slides change in a presentation. Transitions can add a professional look to a slide show, smoothing the change over between slides. Transitions can be applied to individual slides or all the slides in a presentation.
Adding transitions
- In the Sidebar, select the Slide Transition icon
 to open the Slide Transition section
![]()
- In the Slides Pane select the slide or slides to apply the transition
- In the Sidebar select one of the available transitions. When you click in a transition you preview the effect in Impress workspace.
- Modify the selected transition by changing the speed or adding a sound, in the Modify transition section. If you decide to play a sound during transitions, select a sound from the Sound list.
- If a sound is selected, the Loop until next sound option becomes active. Select this option to play the sound repeatedly until another sound starts. If there are no subsequent sounds in your slide show, the selected sound will play continuously for the remainder of the show.
- Select how to advance to the next slide: manually (On mouse click) or automatically (Automatically after). If you select an automatic advance, you can specify how long the slide remains visible before it automatically advances to the next slide.
- If you want the transition to apply to all slides, click Apply to All Slides.
If the Automatic preview checkbox is marked, the effect of a selected transition is immediately displayed in the work area. You can replay the effect at any time by clicking Play.
While using many different transitions may be fun to do, it may not give your slide show a professional appearance.
Removing transitions
To remove a slide transition:
- Select the slides from where you want to remove the transitions.
- Select None transition in the Slide Transition pane.
![]()
Animation effects
Slide animations are similar to transitions, but they are applied to individual elements in a single slide: title, chart, shape, or individual bullet point. Animation effects are applied from Normal view so that you can select individual objects on a single slide
Just as with transitions, heavy use of animations can be fun, but distracting and even annoying for an audience expecting a professional presentation.
Applying animation effects
Select the slide and the object (text box, image) you want to apply the animation effect to.
In the Sidebar, select Custom Animation icon ![]() to open the Custom Animation section.
to open the Custom Animation section.
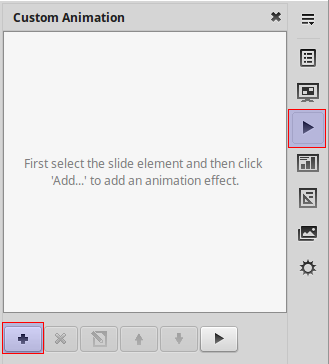
Click Add ![]() to open the Custom Animation dialog
to open the Custom Animation dialog
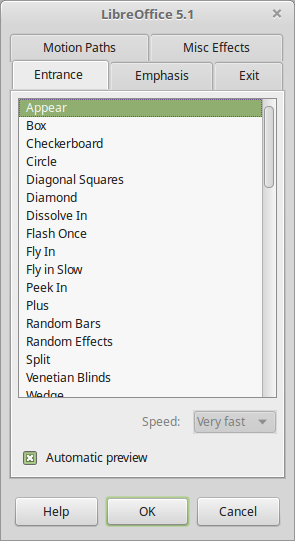
Select the animation effect types from one of the tabbed pages on the Custom Animation dialog. More than one type of animation effect can be applied to an object.
As you add animation to objects they appear on the Custom Animation list in the Sidebar.
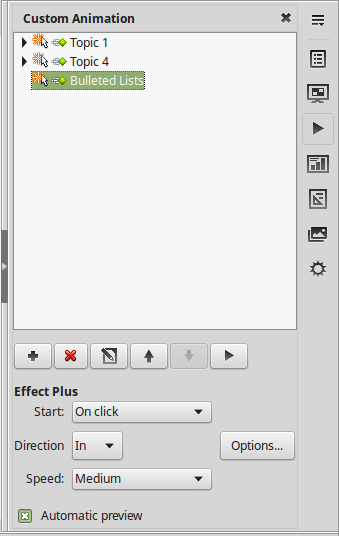
Using the buttons you can add, delete, edit or move animations.
![]()
In the Effect Plus section you can set how the animation will start
- On click − the animation does not start until you click the mouse.
- With previous − the animation runs at the same time as the previous animation.
- After previous − the animation runs as soon as the previous animation ends.
Select the Duration of the animation effect from the Speed drop down list.
If required, select Automatic preview so you can check the animation effect on the object.