Formating Slides
Formating Slides
When you create a presentation your basic workflow usually involves the following steps:
- plan the presentation outline and contents
- setup the page format
- insert and modify content
- style the presentation
In this section we describe how to setup the page (or slide) format and apply basic styling.
Page setup
Any changes to the page/slide format (size, margins, orientation, and so on) apply to all slides in the presentation. You can only define one page style in Impress, whereas in Writer or Calc you can define more than one page style.
To open the Page Setup dialog
- Click on the Format Page/Slide
 button or,
 - Use the menu Slide > Page/Slide Properties command
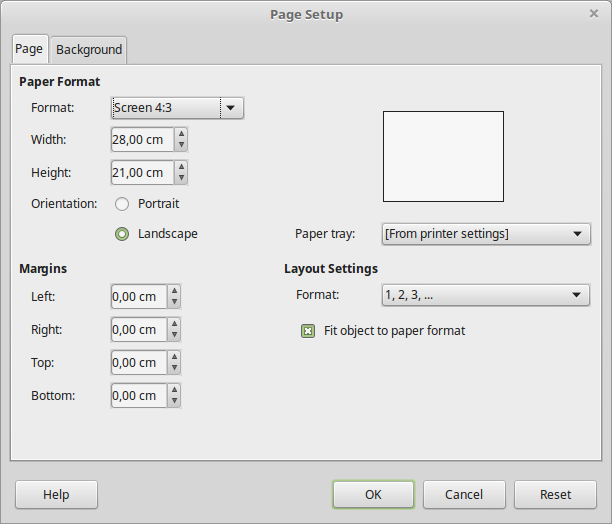
The most important setting here is the paper format. The default is 4:3 ratio but newer projectors support the widescreen 16:9 format. Orientation and margins are usually left with the default values.
You should always set the paper format before inserting any content, especially graphics objects, because changing the format after can have a dramatic effect on your presentation layout.
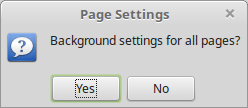
Background
The most basic styling you can apply in a presentation is to change the slides background color. To change the background for all slides or a single slide:
- Select one or more slides in your presentation (in Normal View)
- Open the Page Setup Dialog
- Click on the Background tab, select a background type (color, gradient, or bitmap) and change settings

- A pop-up message asks if you want to change the background on all slides. To apply the new background only to the selected slide or slides, click No. To apply the new background to all slides used in the presentation, click Yes.
Slide masters
A slide master is a slide that is used as the starting point for other slides. It is similar to a page style in Writer: it controls the basic formatting of all slides based on it. You will learn more about slide masters in the next unit.
Slide Master collection
Impress comes with a collection of slide masters. These slide masters are shown in the Master Pages section of the Sidebar. In the Sidebar, click on the Master Pages ![]() icon to open the Master Pages section. This section has three subsections:
icon to open the Master Pages section. This section has three subsections:
- Used in This Presentation
- Recently Used
- Available for Use
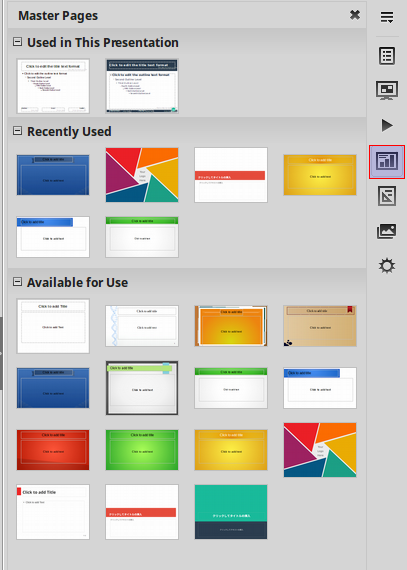
Each of the slide masters shown in the Available for Use list is from a template of the same name. If you have created your own templates, or added templates from other sources, slide masters from those templates will also appear in this list.
Applying a slide master
You can apply a master page to all the slides in a presentation or only selected slides in a presentation.
To apply one of the slide masters to all slides in your presentation:
- Right-click on the slide master you want to use and select Apply to All Slides on the context menu.
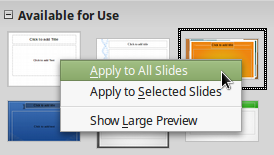
To apply a different slide master to one or more selected slides:
- In the Slide Pane, select the slide or slides where you want to use a new slide master.
- In the Sidebar, right-click on the slide master and select Apply to Selected Slides to All Slides on the context menu.