Sorting and Filtering
Sorting and Filtering
When working with data in a spreadsheet we often need to arrange and organize the data for better viewing and finding. Furthermore we can use Calc as a simple database tool and ask simple questions in order to extract useful information from our data. This is done using the Sorting and Filtering tools. Sorting and filtering in Calc can be accessed using the Sort and Filter section in Standard Toolbar.
Sorting
Sorting within Calc arranges the cells in a sheet using the sort criteria that you specify. Several criteria can be used and a sort applies each criteria consecutively. Sorting is useful when you add new information to a spreadsheet. When a spreadsheet is long, it is usually easier to add new information at the bottom of the sheet, rather than adding rows in their correct place. After you have added information, you can then sort the records to update the spreadsheet.
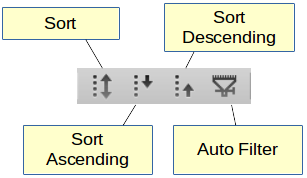
Quick sort ascending
To quickly sort a column in ascending order,
1. Select any cell inside the column

2. Click the ![]() Sort Ascending button.
Sort Ascending button.

Quick sort descending
Repeat the previous steps using the ![]() Sort Descending button.
Sort Descending button.
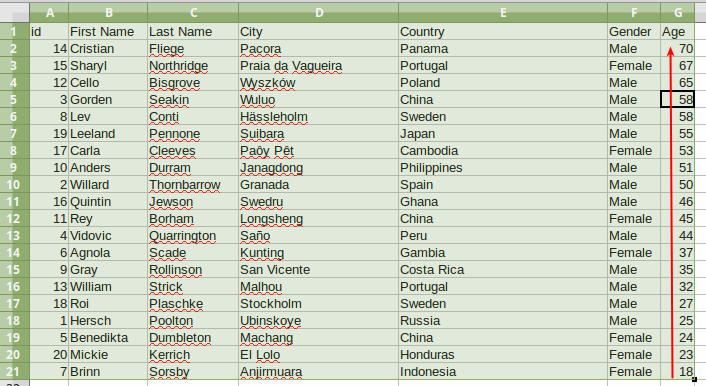
How quick sort works
In Quick Sorting Calc automatically
- discovers the data to be sorted
- recognizes the first row as a header row and does not include this row in the sorting
- extends the sorting to the other columns
Therefore to use this function your data must be in a table format with the first row as a header and no empty rows.
The Sort window
For advanced sorting you must use the ![]() Sort command that brings the Sort Window. Using this command you can specify multiple levels of sorting and advanced options. For example we can set sorting by Last Name, First Name and Country.
Sort command that brings the Sort Window. Using this command you can specify multiple levels of sorting and advanced options. For example we can set sorting by Last Name, First Name and Country.
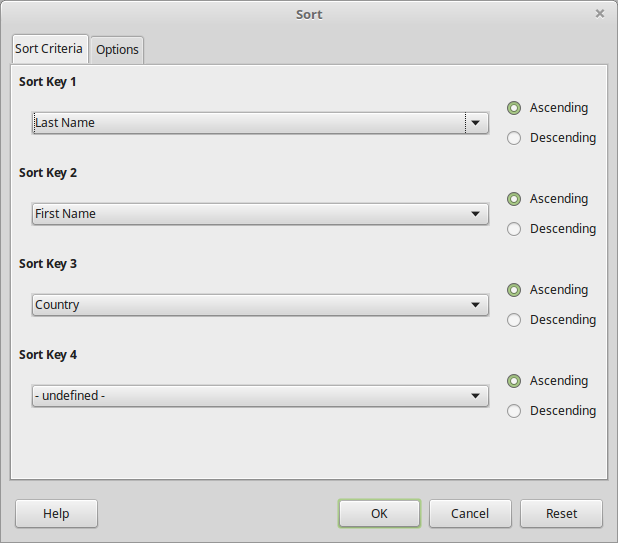
Optionally we can set some more options for the sorting.
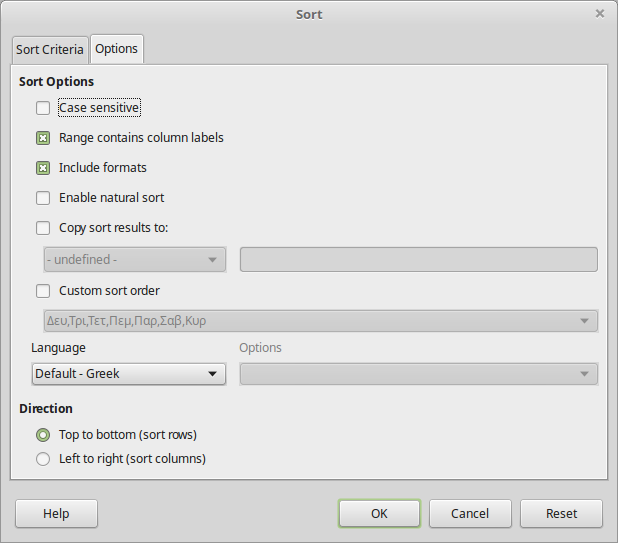
Note that by default the Range contains column labels option is enabled. This means that the first row contains headers that we don't want to include in sorting.
Filtering
When a sheet contains a large amount of data, it can be difficult to find information quickly. In that case Filters can be used to narrow down the data in your worksheet, allowing you to view only the information you need. In other words Filters help you to ask questions to your data and retrieve useful information.
Calc provides three types of filter:
- Standard – specifies the logical conditions to filter your data.
- AutoFilter – Automatically filters the selected cell range and creates one-row list boxes where you can choose the items that you want to display.
- Advanced – uses filter criteria from specified cells.
In this lesson we will cover the AutoFilter command
AutoFilter
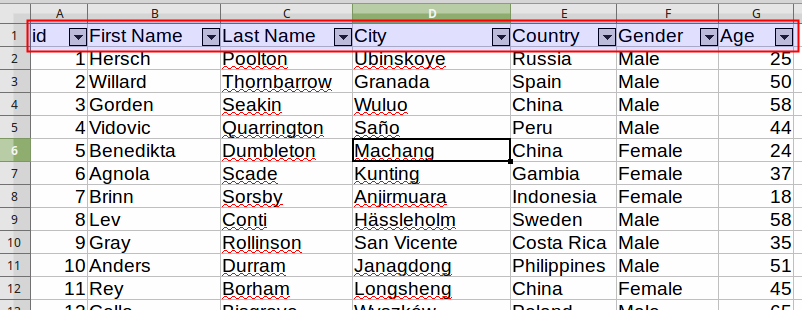
The easiest way to apply filters is using the AutoFilter command. In order to use this command you data must be organized in a table format and meet the following criteria:
- the first row contains column headers. The headers describe the column contents (for example name, age, product)
- Every row after the first contains only data. Each data row represents a record of your data table.
- All records must be in sequence with no empty records in between.
Create an AutoFilter
To create an AutoFilter simply click on the ![]() AutoFilter Button. A drop-down arrow will appear in the header cell for each column.
AutoFilter Button. A drop-down arrow will appear in the header cell for each column.
Applying a filter
To apply a filter click on a column's drop-down arrow to bring the filter window. In this window you can set the filter criteria. For example to show only the Female persons we deselect the other values.
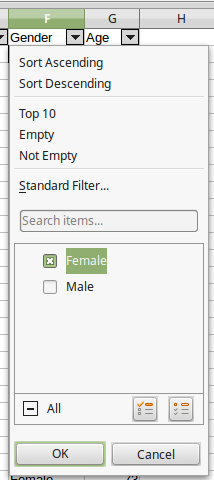
After we apply a filter the data in our sheet are updated and the filter drop-down arrow is highlighted to indicate the filter existence.

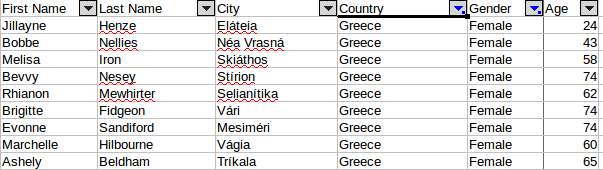
We can apply more filters the same way. For example to show only Females from Greece we add another filter to the Country column. Click the All option to remove all values and the select the country Greece.
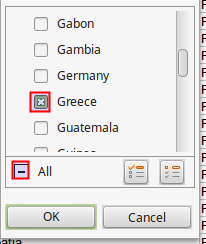
Now the second filters applies in combination with the first.
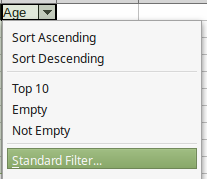
Standard Filter
For more advanced filters click the Standard Filter option on the Filter drop-down.
The Standard Filter window displays existing filters and allow us to set new custom filters. For example we can set a filter to show only people aged 50 and above.
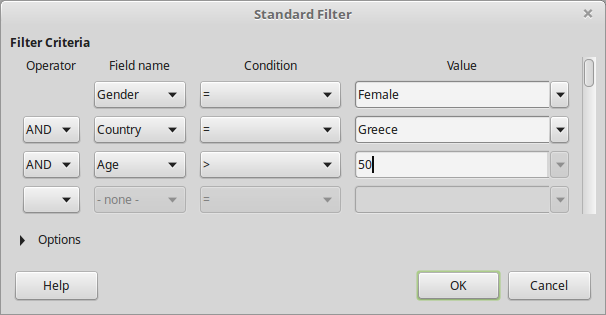
To create a standard filter in general you specify the
- Operator. Can be the logical AND or logical OR.
- Field name. This is the name of the column
- Condition. A logical condition (equality, greater, less)
- Value. The value of the filter.
Removing a Filter
To remove a Filter click on the drop-down arrow and enable the All option.
![]()
Remove AutoFilter
When AutoFilter is enabled the ![]() AutoFilter button is highlighted. Click on this button to remove the AutoFilter function and all filters from your data.
AutoFilter button is highlighted. Click on this button to remove the AutoFilter function and all filters from your data.