Submodule 12.2: Blending modes
| Site: | ΕΛ/ΛΑΚ Moodle |
| Course: | Web Design and Digital Content Production |
| Book: | Submodule 12.2: Blending modes |
| Printed by: | Επισκέπτης (Guest user) |
| Date: | Wednesday, 15 October 2025, 11:21 PM |
Description
- Screen mode
- Darken only mode.
Layers modes
GIMP has twenty-one layer modes. Layer modes are also sometimes called “Blending modes”. Selecting a layer mode changes the appearance of the layer or image, based on the layer or layers beneath it.
In this course, we will see just two of them, the "Screen" and the "Darken only" mode.
Screen mode
We have already created the Red, Green and Blue components- channels

of the following image in the submodule 10.3 using javascript on the Canvas HTML5 element.
Let's combine the three channels to create the original image, using the Screen mode. Notice the image that is created when we combine only the red and green images:
Darken only mode
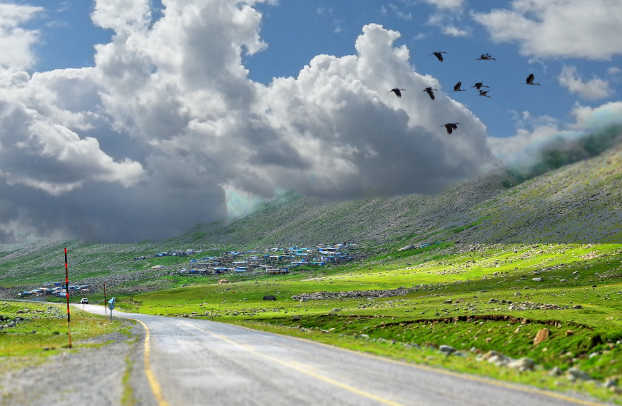
In this video, I have open in Gimp three files, a road with cloudy sky, clouds and some birds. I will use these files to create a gimp file.
I will place some clouds in the sky.
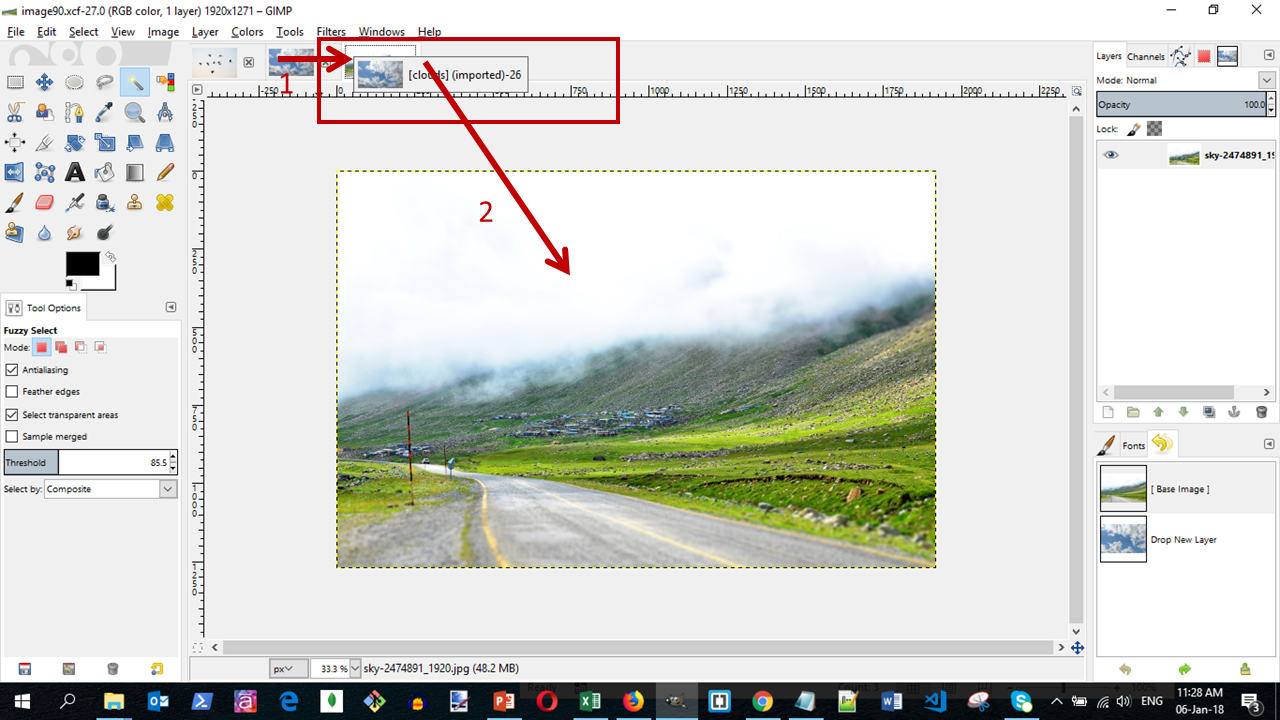
We will take the image with the clouds and drag it over the image with the road. You may need to experiment a little until you find the correct position to place the image.
Next, we go to "modes" and choose the Darken only. With this mode, only the darken pixels will be shown.
Thus, since the clouds are darker than the sky, only the clouds will be shown. Also, since the mountain under the clouds is darker than these, the mountain will still be shown.
You can find the file of the video at: courseGimp>xcfFiles>image90.xcf
Exercise
- Open the file
image90.xcfin the folder "courseGimp>xcfFiles" in your Gimp and save it asexercise12.2.02.xcfin the folder "courseGimp> exercises". - Modify and save the file. The output should be as shown in the following image: